
Gemini AI photo editing prompts for black and white are text instructions you type into Google Gemini to convert, enhance, or completely transform your photos into monochrome images — with precise control over shadow, contrast, grain, texture, and mood.
Let me be straight with you. My first attempt at this was embarrassing. I typed “make this black and white” into Gemini, hit enter, and got back something that looked like a washed-out grayscale filter from a 2009 phone app. No depth. No drama. No soul.
So I spent weeks testing different prompts. I failed a lot. I tried weird combinations. I referenced old photographers, old films, and old print techniques. Slowly, the results got better. Then they got really good. And now the photos I produce with Gemini prompts genuinely surprise people. They ask what expensive software I use.
The answer is just words. The right words in the right order. That’s what this entire guide is about. If you’re new to this, I’d also suggest reading how to create amazing photos with Gemini AI before diving into these prompts — it covers the full foundation. But if you’re ready to go, let’s get into it.
Why Does Black and White Photography Need Specific Prompts?
Black and white photography needs specific prompts because color carries emotion automatically — and when it’s removed, the AI needs detailed instructions to rebuild that emotion using only tone, shadow, and light.
Color does invisible work in every photo you take. A warm orange sunset feels cozy. A deep red dress feels bold. A soft blue sky feels calm. That emotion happens without effort because color triggers it directly.
Take the color away and none of that exists anymore. The photo has to earn its emotion through structure. Through shadow. Through the way light falls across a face or a mountain or a building. That’s much harder — and a vague prompt leaves the AI guessing.
I think about it like giving someone directions. “Go that way” won’t get you anywhere specific. But “turn left on Oak Street, drive four blocks, stop at the brick building on the corner” gets you exactly where you need to be. Your Gemini prompt works the same way. Every specific detail you add brings the result closer to what you’re actually imagining.
| Photo Element | What It Does in Color | What It Does in Black and White |
|---|---|---|
| Color | Creates emotion instantly | Removed — tone replaces it completely |
| Contrast | Separates objects | Becomes the main visual storytelling tool |
| Shadow | Adds dimension | Defines shape, mood, and depth |
| Highlight | Creates energy and brightness | Controls the overall exposure feel |
| Texture | Adds surface interest | Becomes dramatically more visible and important |
| Grain | Optional style choice | Adds film-like authenticity and character |
| Vignette | Guides the viewer’s eye | Creates intimacy and natural framing |
If you want to go deeper on writing great Gemini prompts beyond black and white, check out this guide on how to write Gemini photo editing prompts — it breaks down the full process in detail.
How Do You Build a Strong Black and White Prompt for Gemini?
You build a strong prompt by combining three things: what you want changed, how bright or dark the result should feel, and what mood or style you’re going for.
I call it the three-part rule. It’s simple but it genuinely works:
- The Action — Tell Gemini exactly what to do. “Convert to black and white” is fine, but “convert to high-contrast black and white and deepen the shadow areas” is far better. The more specific the action, the more precise the result.
- The Tone — Describe how bright or dark you want the image to feel. Words like “deep blacks,” “soft mid-tones,” “bright airy highlights,” or “full tonal range from pure black to clean white” guide the AI’s exposure decisions instantly.
- The Mood or Style Reference — This is the part most people skip, and it’s actually the most powerful. Phrases like “film noir,” “Ansel Adams landscape,” “vintage documentary,” or “fine art studio portrait” give Gemini a complete creative direction to follow. It’s like showing a hairstylist a photo — it removes all the guesswork.
Once I started using this formula consistently, my prompts stopped producing random results. I knew what to expect before I even hit enter.
Before you upload your photo and write your prompt, think about the ratio of your image. The ratio affects how Gemini processes and outputs the edited version. Here’s a quick guide:
- 9:16 (Vertical) — This is the standard smartphone photo ratio. It’s tall and narrow. Perfect for portraits, TikTok-style content, Instagram Stories, and Reels. Most phone cameras shoot in this format by default.
- 16:9 (Horizontal / Landscape) — Wide and cinematic. Great for landscapes, architecture, group shots, and anything you plan to use on a website, YouTube thumbnail, or desktop wallpaper.
- 1:1 (Square) — Equal width and height. The Instagram grid standard. Works beautifully for portraits, product shots, and any image where you want a clean, balanced composition.
- 4:5 (Portrait Rectangle) — Slightly taller than wide. Instagram’s preferred portrait format. It takes up more screen space than 1:1 and tends to perform better in feed placement.
- 4:3 (Classic Camera) — The standard ratio for older cameras and tablets. Slightly wider than tall. Works well for editorial prints and physical photo prints.
- 3:2 (DSLR Standard) — Common in professional DSLR and mirrorless cameras. Slightly wider than 4:3. Great for prints, magazines, and editorial use.
You can include your ratio preference directly in your prompt. For example: “Convert this 9:16 vertical smartphone portrait to high-contrast black and white…” — This tells Gemini the format it’s working with, which helps it make smarter tonal decisions for the composition.

Gemini works best when it has a real reference image to edit. Here’s how to do it properly:
- Upload before you type your prompt — Attach your photo to the Gemini chat first. Then write your editing prompt. This gives the AI something concrete to work with instead of generating from scratch.
- Use the highest quality version you have — Don’t upload a heavily compressed or blurry image. Gemini can only enhance what’s already there. A sharp, well-lit original gives you a much better result.
- Match your prompt to the content of your photo — If you upload a landscape, use a landscape prompt. If you upload a portrait, use a portrait prompt. Mixing the two confuses the AI and produces odd results.
- Try multiple prompts on the same image — Don’t settle for the first result. Upload the same photo and try three or four different prompts. The difference between them can be dramatic.
- Keep your original file — Always save the original untouched photo somewhere safe. You’ll want to go back to it when you try a new prompt or a different style.
If you’re curious about what other trending Gemini AI prompts people are using right now, that’s a great place to explore after reading this guide.
What Are the 17 Best Gemini AI Photo Editing Prompts for Black and White?
The 17 best Gemini AI photo editing prompts for black and white cover portraits, landscapes, street photography, architecture, fine art, vintage film, sports, weddings, and abstract styles — each one designed for a specific mood and result.
Here they are — one by one, fully explained.
Prompt 1 — How Do You Get a Classic High-Contrast Portrait in Black and White?

“Convert this portrait to black and white. Increase the contrast strongly. Deepen the shadows under the jawline and cheekbones. Keep the highlight detail in the eyes and forehead. Add a slight mid-tone lift so skin texture stays visible. Make it feel bold and confident.”
I love this prompt for headshots. The part about deepening shadows “under the jawline and cheekbones” gives Gemini specific facial landmarks to work with. That’s the difference between a sculpted portrait and a flat one.
The instruction to keep “highlight detail in the eyes” is something I learned after a few ruined shots. Without it, Gemini tends to blow out the brightest areas. You lose detail in the eyes and forehead. The face starts to look artificial. That one line protects the most important parts of a portrait.
The mid-tone lift at the end stops the skin from going muddy or too dark. You get real contrast without losing the texture of the face.
Best for: Headshots, LinkedIn profiles, actor portfolios, editorial fashion, professional portraits.
Prompt 2 — How Do You Create a Dramatic Black and White Landscape?

“Apply a dramatic black and white conversion to this landscape photo. Use a full tonal range from pure black to bright white. Bring out the texture in the clouds and sky. Enhance the detail in the foreground terrain. Keep the horizon line sharp and contrasty. Make the mood feel powerful and vast.”
The phrase “full tonal range from pure black to bright white” is where the magic lives in this prompt. It tells Gemini not to stay in the gray middle. Push the darks all the way down. Push the lights all the way up. Everything else falls naturally in between — and the result looks like a photograph taken with real intention.
I used this on a coastal cliff photo once. The before was nice. Pleasant. Forgettable. The after looked like something out of a nature documentary. The clouds became three-dimensional. The rocks looked ancient and heavy. The whole photo gained a sense of weight that wasn’t there before.
The “cloud texture” instruction is one I never leave out for skies. Without it, Gemini tends to flatten clouds into a smooth gray wash. With it, every cloud formation pops with definition.
Best for: Mountains, coastlines, deserts, forests, open fields, dramatic sky photography.
Prompt 3 — How Do You Add a Film Noir Feel to a Street Photo?
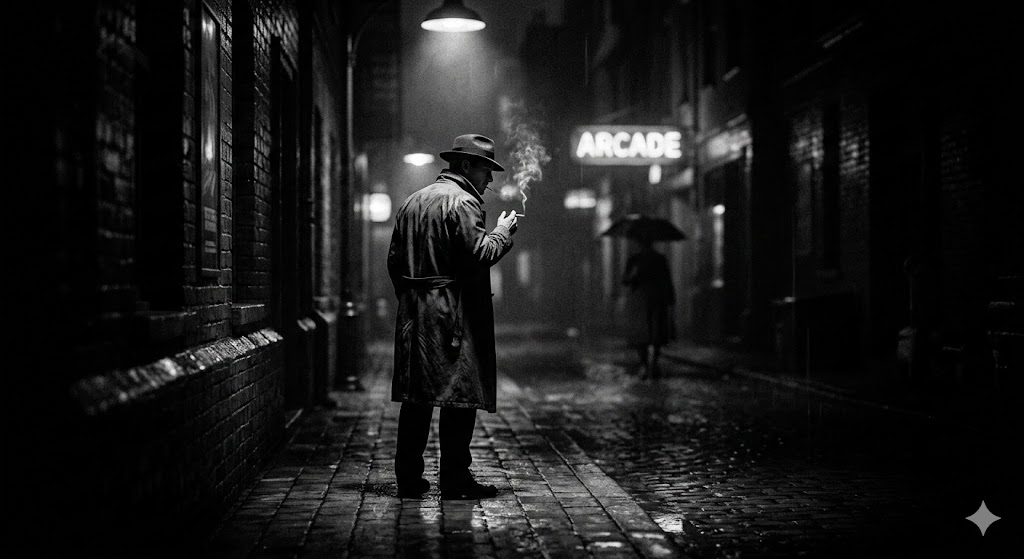
“Convert this street photo to black and white with a film noir style. Add deep shadows in the corners and background. Increase contrast on the main subject. Add medium film grain. Make the lighting feel dramatic and cinematic, like a 1940s crime movie still.”
The “1940s crime movie still” reference is what makes this prompt so effective. It’s not just a technical instruction — it’s a visual reference point that Gemini understands deeply. Film noir means specific things: deep shadows, hard light, mysterious atmosphere, gritty grain.
I’ve taken this prompt into actual alleyways and night streets and tested it on phone photos. The results were genuinely cinematic. One photo of a rain-wet sidewalk under a street lamp looked like it belonged in a classic detective film. My friend thought I had hired a photo editor.
Adding “medium film grain” at this stage is intentional. Fine grain would feel too clean for noir. Heavy grain can overpower the detail. Medium grain hits the sweet spot — it adds atmosphere without destroying clarity.
If you enjoy using Gemini for urban and street-style creative shots, there’s a full collection of trending Gemini AI prompts worth exploring too.
Best for: Urban night photography, alleyways, street scenes under rain or fog, cinematic portraits outdoors.
Prompt 4 — How Do You Make a Children’s Portrait Look Soft and Timeless in Black and White?
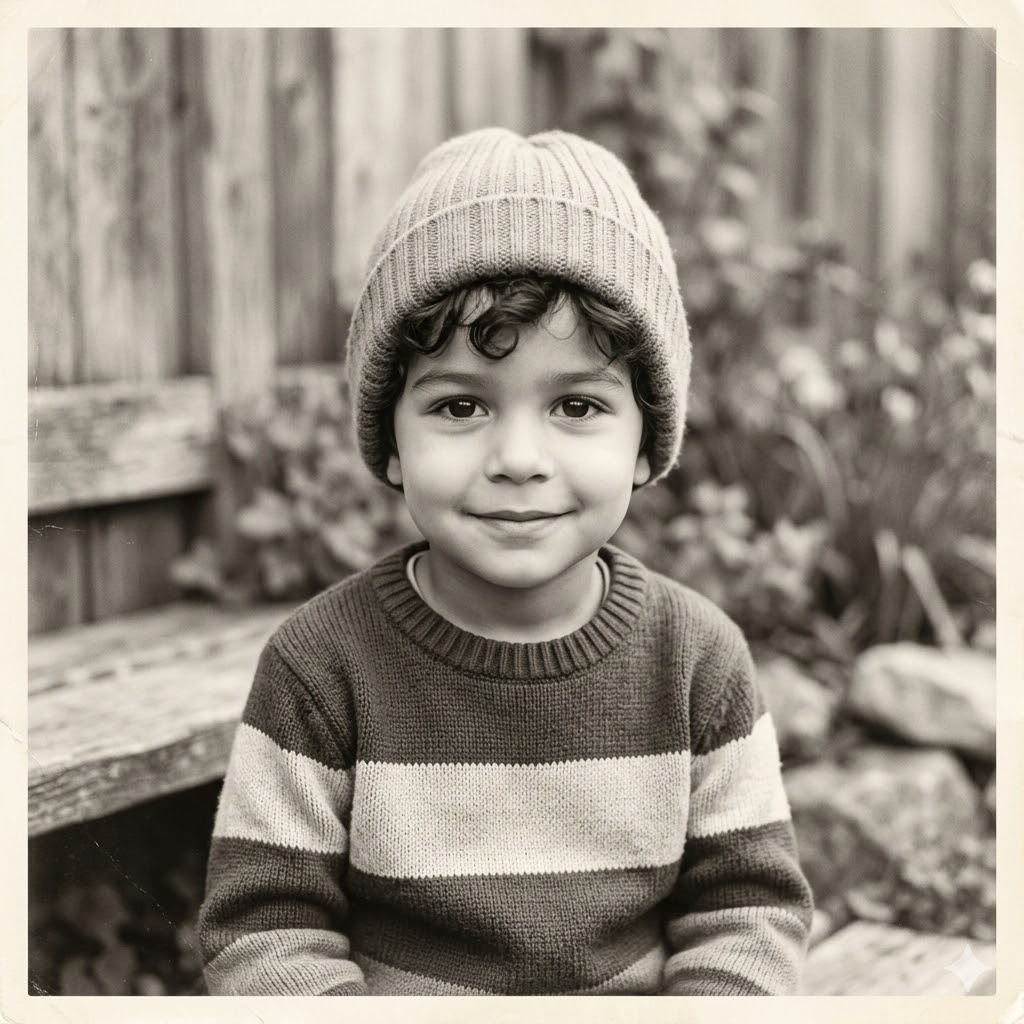
“Convert this children’s portrait to black and white. Keep the tones soft and gentle. Avoid deep or harsh shadows. Lift the highlights slightly. Add a faint warm tint to the whites to give it a nostalgic feel. Make it look like a treasured old family photo.”
Not every black and white photo should be dramatic. That was one of the early mistakes I kept making — I treated every subject the same way. Dark and contrasty might be perfect for a moody portrait, but for a photo of a toddler laughing, it just looks wrong.
This prompt goes in the opposite direction on purpose. “Avoid deep or harsh shadows” is the most important line here. Kids have soft, round faces. Heavy shadows make them look harsh and severe. By specifically asking Gemini to avoid that, you keep the natural softness of the subject.
The “warm tint to the whites” is a small detail that makes a big difference. It shifts the blacks and whites away from cold, clinical tones and into something warmer — like an old print that’s been sitting in a photo album for twenty years. It feels loved.
If you’re also creating sweet Gemini portraits for family moments, you’ll enjoy these family photo prompts for Gemini AI for more warm and personal editing ideas.
Best for: Baby photos, toddler portraits, family moments, sibling photos, holiday memories.
Prompt 5 — How Do You Make Architecture Look Strong and Bold in Black and White?
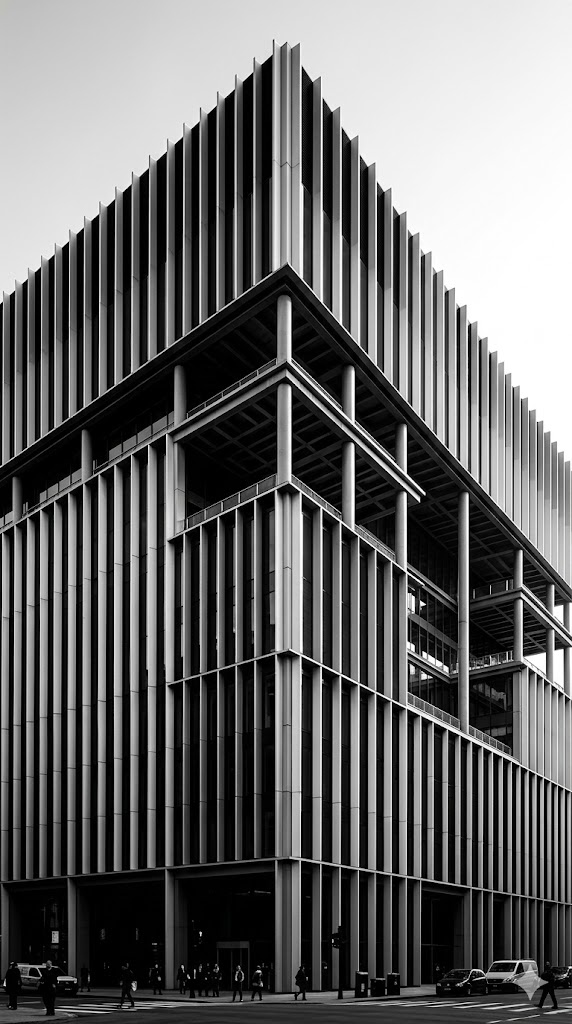
“Convert this architectural photo to black and white. Increase contrast on the building’s lines and edges. Deepen the shadows between structural elements. Brighten the sky to create strong contrast behind the building. Keep the geometric details sharp. Make it feel precise and monumental.”
Architecture in black and white is one of the most rewarding subjects to edit. Buildings are built from geometry — straight lines, repeating patterns, sharp angles. When you remove color and amp up the contrast on those shapes, the result is almost graphic. It looks like art direction, not just a photo.
The instruction to “brighten the sky” is a trick I picked up from architectural photographers. When the sky is slightly brighter than the building, the structure stands out with natural clarity. No extra cutouts or masks needed — just a tonal difference that the eye reads as separation.
“Sharp geometric details” at the end tells Gemini not to soften anything. Architecture wants precision. It doesn’t want the gentle treatment you’d use on a portrait.
Best for: Modern buildings, churches, bridges, industrial structures, interior architecture, geometric facades.
Prompt 6 — How Do You Create a Vintage Film Look in Black and White?
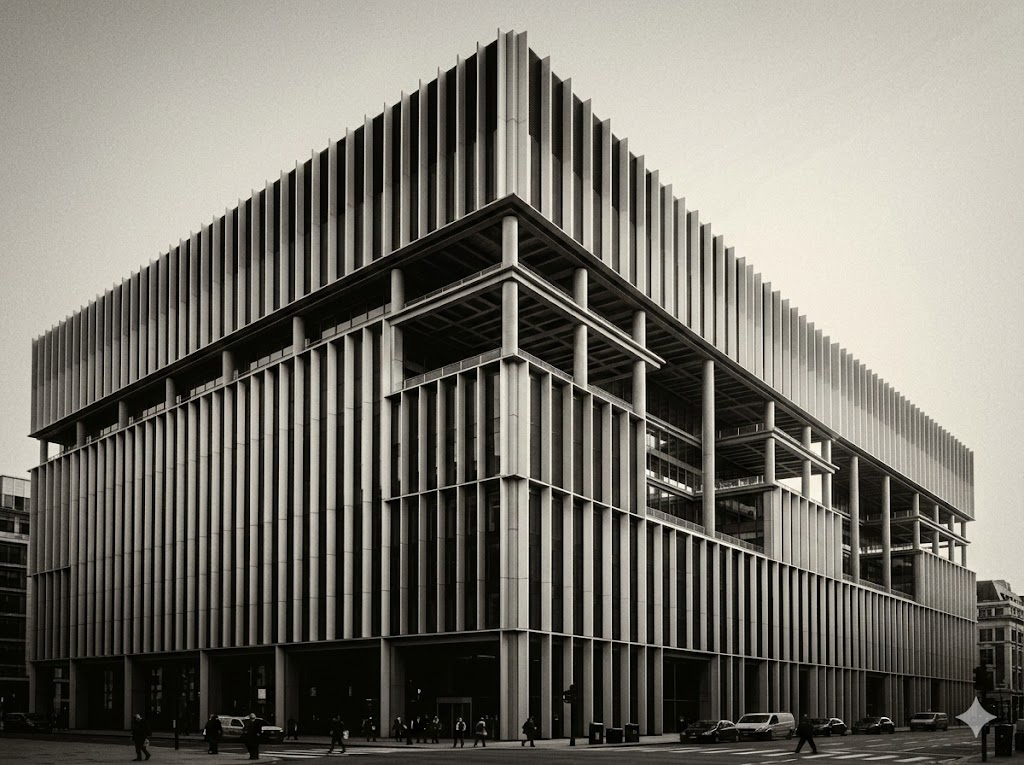
“Apply a vintage black and white film look to this photo. Add medium-to-heavy organic grain that feels natural, not digital. Reduce the overall contrast slightly to mimic aged film stock. Fade the blacks so they look dark gray rather than pure black. Apply a subtle vignette around the edges. Make it feel like a real photo from the 1960s.”
The secret in this prompt is asking for imperfection. That sounds strange, but hear me out. Modern photos are too clean. Too sharp. Too perfect. Vintage photos are not. They have grain. Their blacks are faded. Their edges are darker. That combination of small “flaws” is what makes an old photo feel real and human.
When you ask Gemini for all of those imperfections together — organic grain, faded blacks, edge vignette — the result doesn’t look like a filter. It looks like a genuine photograph from another era.
The word “organic” in “organic grain” is something I always include. Digital grain is random and harsh. Organic grain has a natural, consistent pattern. That single word steers Gemini toward a much more believable result.
For more ideas in this direction, check out these retro style and vintage-inspired Gemini design prompts — they pair perfectly with vintage black and white edits.
Best for: Lifestyle photography, travel snapshots, nostalgic portraits, retro fashion editorials.
Prompt 7 — How Do You Make a Stormy Sky Look Dramatic in Black and White?

“Convert this sky photo to black and white. Dramatically darken the sky while keeping cloud texture fully visible. Brighten the horizon line slightly to create contrast. Boost contrast between the clouds and the sky background. Make the mood feel stormy, raw, and powerful.”
I tested this prompt on a photo I took of an incoming storm over an open field. Before the edit, the sky looked like any overcast afternoon. After, it looked like the sky was about to tear open. The clouds became heavy, dark, and three-dimensional. The horizon glowed beneath them.
The phrase “keep cloud texture fully visible” is critical. When you darken a sky aggressively without this instruction, the clouds can merge into the sky and disappear. You lose the very detail you’re trying to enhance. Telling Gemini to protect the texture first — then darken around it — gives you drama without losing definition.
“Raw and powerful” at the end sets the emotional target. Not elegant. Not beautiful. Raw. Gemini responds to that difference.
Best for: Weather photography, open landscape skies, seascape storm shots, dramatic nature photos.
Prompt 8 — How Do You Edit a Macro Photo to Show Stunning Texture in Black and White?

“Convert this macro photo to black and white. Enhance the fine surface texture of the subject in detail. Increase micro-contrast to make small surface patterns pop. Keep the background as a clean, soft, even gray. Make the subject feel almost sculptural and three-dimensional.”
Macro photography is all about the tiny details you can’t see with the naked eye. A fabric weave. A flower petal’s veins. A fingerprint. An insect’s eye. Black and white strips away the distraction of color and puts all of that texture front and center.
“Micro-contrast” is a technical term that means increasing contrast at the smallest detail level — not the overall image contrast, but the contrast between individual surface features. It’s what makes a piece of bark look rough enough to touch. That one word in the prompt can transform an ordinary close-up into something extraordinary.
Keeping the background “clean, soft, even gray” is just as important as what you do to the subject. A distracting or textured background competes with your subject. A soft, neutral gray frame focuses everything on the main object.
Best for: Flower close-ups, insect photography, fabric textures, product surface details, food macro shots.
Prompt 9 — How Do You Create a High-Key Black and White Photo That Feels Light and Airy?
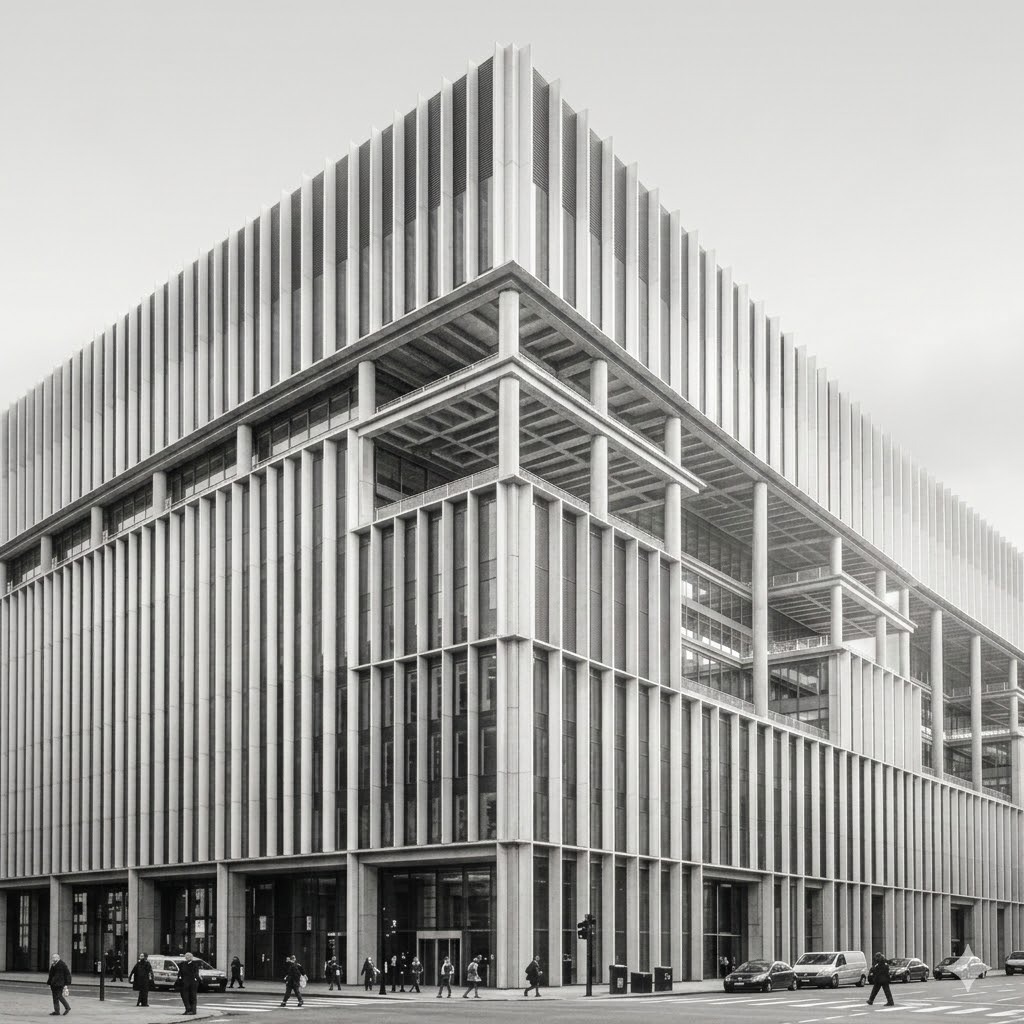
“Apply a high-key black and white conversion to this photo. Lift the overall exposure to feel bright and open. Reduce shadow intensity so nothing goes too dark. Keep the highlights clean and detailed without blowing them out. Make the mood feel soft, calm, and minimalist.”
High-key black and white is the opposite of everything dramatic. It’s calm. It’s open. It’s clean. Think beauty campaigns. Spa branding. Simple product photography. Everything is bright and light.
The challenge with high-key editing is getting brightness without losing detail. “Keep the highlights clean and detailed without blowing them out” is the line that prevents Gemini from just overexposing everything. You want controlled brightness — every highlight still holds texture and definition.
“Reduce shadow intensity” is equally important. Without that instruction, Gemini’s default behavior might still add shadows out of habit. Telling it specifically not to go dark keeps the image consistently light throughout.
Best for: Beauty photography, wellness brands, minimalist product shots, lifestyle content, clean editorial.
Prompt 10 — How Do You Edit a Low-Key Portrait That Feels Dark and Cinematic?
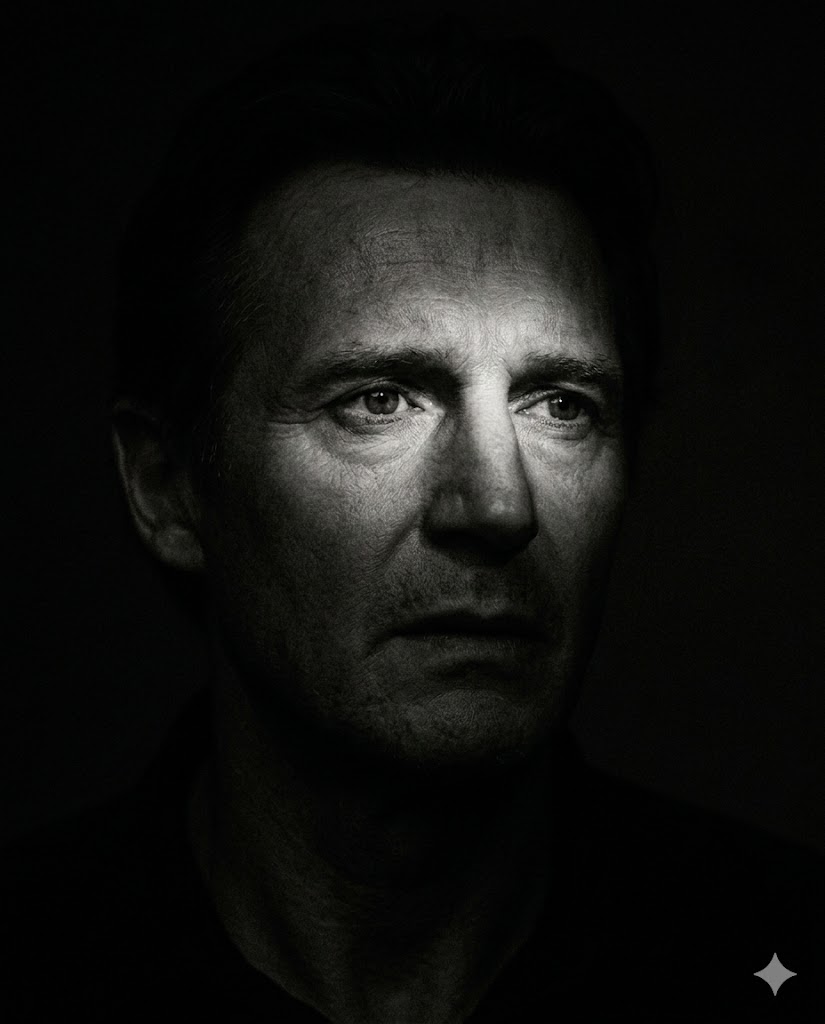
“Apply a low-key black and white edit to this portrait. Use very deep, dense black in the background and shadow areas. Keep only the key facial features lit — eyes, nose bridge, and part of the forehead. Add slight grain to push the cinematic quality. Make it feel like a movie still from a psychological thriller.”
Low-key portraits are some of the most striking images you can create with black and white. The face emerges from near-total darkness. The viewer’s eye is pulled immediately to the small areas of light.
The most important line in this prompt is “keep only the key facial features lit.” That’s the artistic decision that defines low-key photography. You’re not lighting the whole face. You’re choosing which parts the viewer sees. Eyes. Nose bridge. Maybe a cheekbone. Everything else fades into dark.
“Psychological thriller” gives Gemini an emotional reference point that goes beyond just dark tones. It asks for tension. Mystery. Something slightly unsettling but beautifully composed. That reference actually affects the output in noticeable ways.
For more dramatic male portrait ideas, see best Gemini AI prompts for boys and men — many of those prompts pair well with low-key black and white editing.
Best for: Artistic portraits, band and musician photography, fine art black and white, moody personal branding.
Prompt 11 — How Do You Edit a Street Photo to Look Like a Real Documentary?
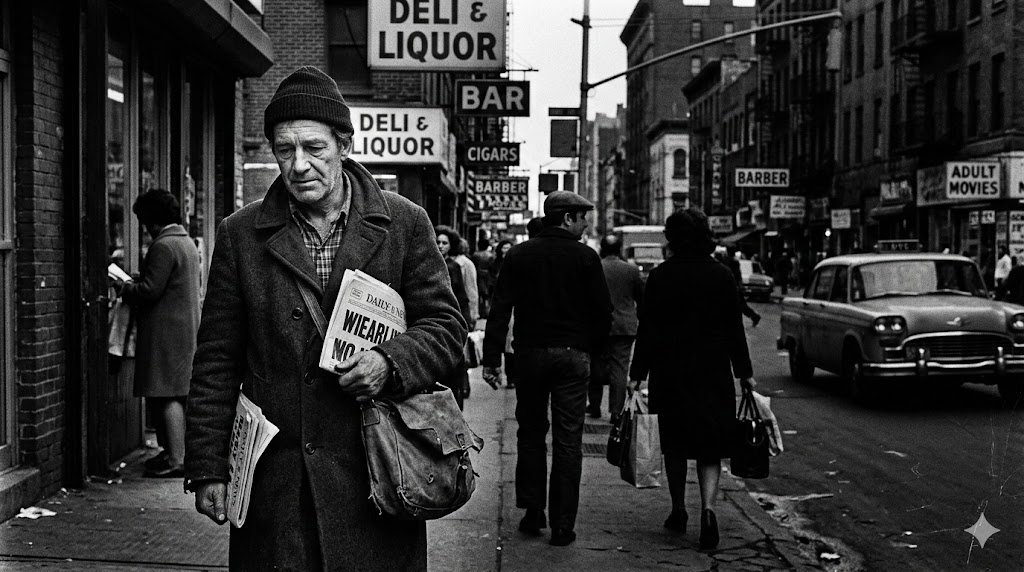
“Convert this street photo to black and white. Add medium grain for a photojournalism feel. Increase contrast on the main subject to separate them from the background. Slightly darken the background to push it further back. Keep the mood honest, raw, and documentary-style — like it was taken by a photojournalist in the 1970s.”
Street photography is about real moments. Real people. Real light. The editing should reflect that. Over-polished street photos lose the thing that makes them worth looking at in the first place — their honesty.
“Photojournalism feel” and “1970s” are two references that work together perfectly here. They tell Gemini: gritty grain, honest contrast, no artificial softening, no beauty retouching. The photo should look captured, not crafted.
The instruction to “darken the background” is a practical trick. In a busy street scene, the background can fight for attention with the main subject. Pushing it darker by just a small amount creates natural separation — like the subject steps forward from the scene.
Best for: Urban street scenes, travel documentary, candid crowds, reportage, social commentary photography.
Prompt 12 — How Do You Edit a Wedding Photo in Black and White Without Losing the Emotion?
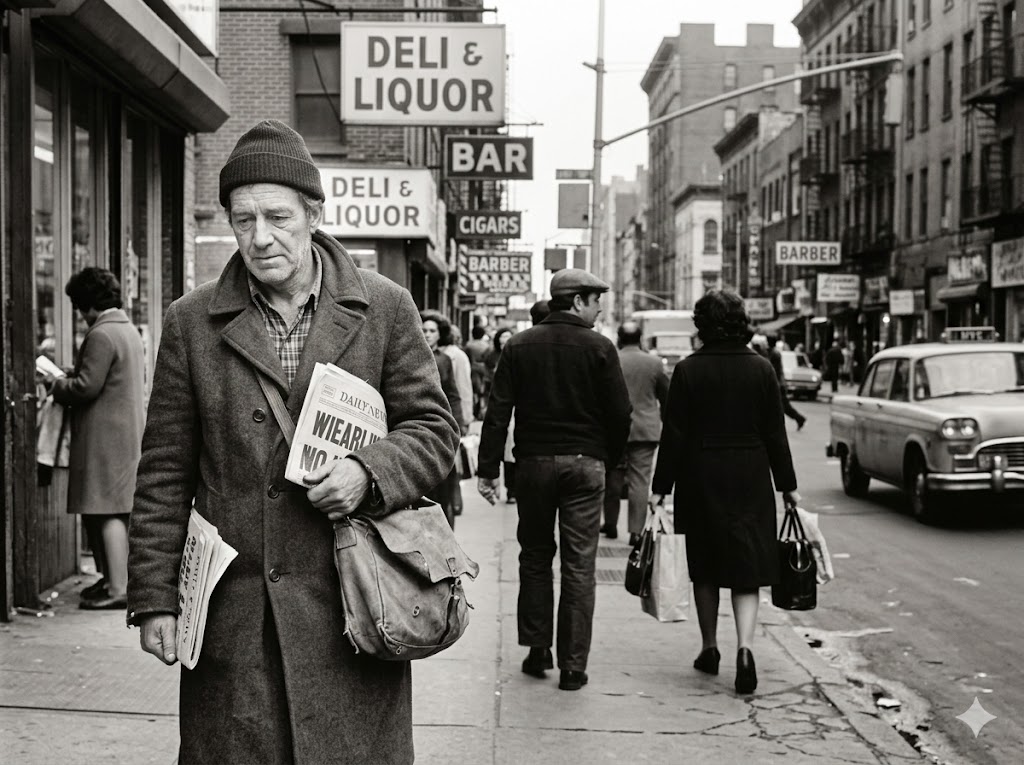
“Convert this wedding photo to black and white. Keep the tones elegant, soft, and bright. Preserve the detail in the white dress — keep it bright but not overexposed. Gently soften the shadows without losing depth. Lift the luminosity on skin tones slightly. Make it feel timeless, romantic, and like something you’d frame on a wall forever.”
Wedding photos need a completely different approach from dramatic or moody black and white. The goal is not tension or power — it’s beauty and emotion. Those are different targets and they need different instructions.
“Preserve the detail in the white dress” is the most critical line. The dress is the center of the composition in most wedding shots. If Gemini overexposes it and the detail disappears, the photo loses its anchor. That one instruction protects the most important element.
“Timeless, romantic, and something you’d frame on a wall forever” might sound overly poetic for a technical prompt, but it genuinely steers the AI toward softer, warmer, more elegant decisions. I’ve compared results with and without that line — the difference is real.
If you’re also creating couple portraits, the couple photo prompts for Gemini AI have some beautiful options that complement wedding black and white edits.
Best for: Wedding ceremonies, first dances, vows, couple portraits, bridal detail shots, reception moments.
Prompt 13 — How Do You Make a Sports Photo Feel Powerful in Black and White?

“Convert this sports action photo to black and white. Boost overall contrast to make the subject feel strong and powerful. Apply subtle motion blur to the background while keeping the subject sharp and in focus. Deepen shadow areas on the body. Make it feel intense and raw, like a classic sports magazine cover from the 1980s.”
Color sports photography is great. But black and white sports photography has a different energy. It feels more permanent. More historic. Like the moment matters beyond just what happened — like it belongs in a record somewhere.
The motion blur on the background is what creates the sense of speed and energy. It tells the viewer “this person is moving fast” without needing any color or action sequence to prove it. I always add it for running, cycling, martial arts, or any sport with physical movement.
“Classic sports magazine cover from the 1980s” gives Gemini a visual reference that implies specific things: strong contrast, clean whites, grainy texture, powerful composition. The era reference alone changes the output noticeably.
Best for: Running, cycling, football, basketball, boxing, swimming, any high-energy athletic moment.
Prompt 14 — How Do You Turn a Still Life Photo Into a Fine Art Black and White?
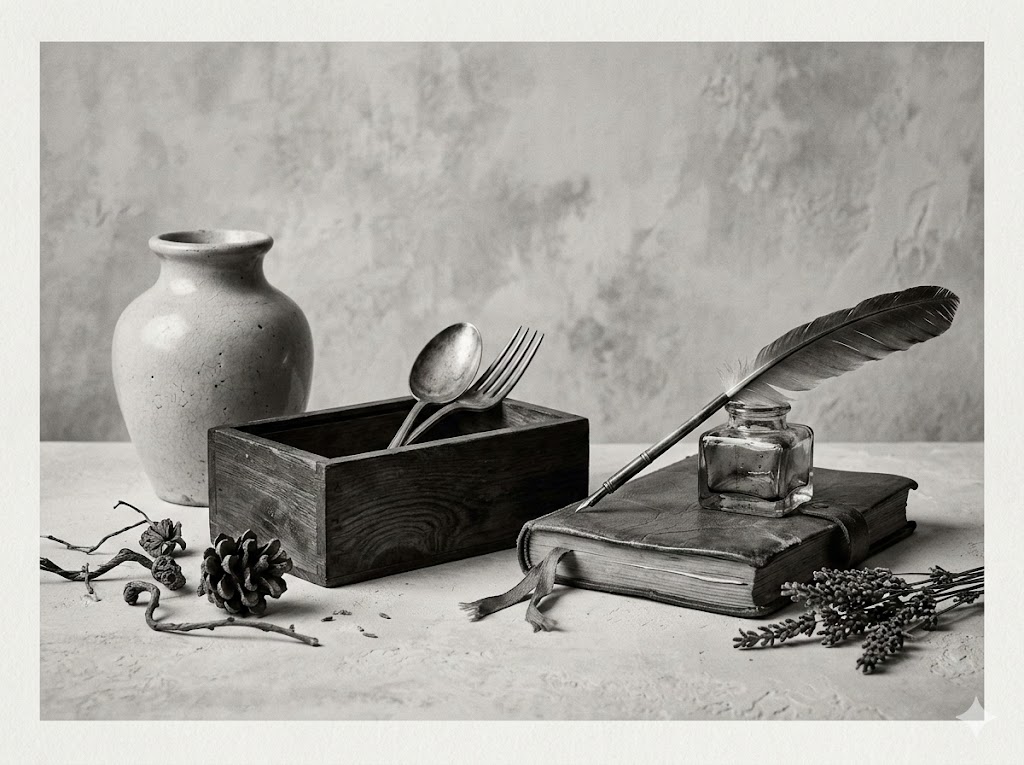
“Apply a fine art black and white conversion to this still life photo. Enhance the surface texture of every object individually. Use soft, directional light tones to create natural dimension. Keep the tonal range wide but refined — not harsh. Make it feel like a carefully printed fine art photograph.”
Still life photography in black and white is a study in patience. You’re not chasing action or emotion. You’re letting objects speak through their surfaces. A ceramic bowl. A piece of fruit. A glass of water. A bunch of flowers. When you remove color from those things and enhance their texture, something quiet and beautiful happens.
“Enhance surface texture of every object individually” is what separates this prompt from a generic conversion. I’m asking Gemini to look at each object separately and bring out its specific surface character. The roughness of terracotta. The smoothness of glass. The organic irregularity of a leaf. Each one deserves its own treatment.
“Carefully printed fine art photograph” sets a high standard. Gemini interprets that as: nothing rushed, nothing over-processed, every tonal decision made with intention.
Best for: Food photography, flower arrangements, product textures, tabletop compositions, gallery prints.
Prompt 15 — How Do You Create a Silver Gelatin Print Effect in Black and White?

“Apply a silver gelatin darkroom print effect to this photo. Use a cool, neutral gray tonal base — not warm. Add slight halation to bright edges where highlights meet shadows. Keep the blacks dense and rich. Add very fine, subtle grain. Make it look like a hand-printed photograph from a professional darkroom.”
If you’ve ever been to a fine art photography gallery and seen those black and white prints that seem to glow from within — those are almost certainly silver gelatin prints. They’re made in a physical darkroom using photographic paper coated in silver compounds. The look they produce is unmistakable.
“Cool, neutral gray” is the tonal base that defines the style. Unlike sepia or warm-toned vintage prints, silver gelatin prints are cool. Sometimes even slightly blue-gray. Specifying “not warm” prevents Gemini from defaulting toward nostalgia tones.
“Halation on bright edges” is a specific optical effect where bright areas seem to glow slightly into the surrounding dark. It’s subtle, but it’s what makes silver gelatin prints feel alive rather than flat. That single word — halation — unlocks a detail most digital photos never have.
Best for: Fine art portraits, landscape art prints, gallery-quality photography, artistic black and white work.
Prompt 16 — How Do You Create an Infrared Black and White Look?
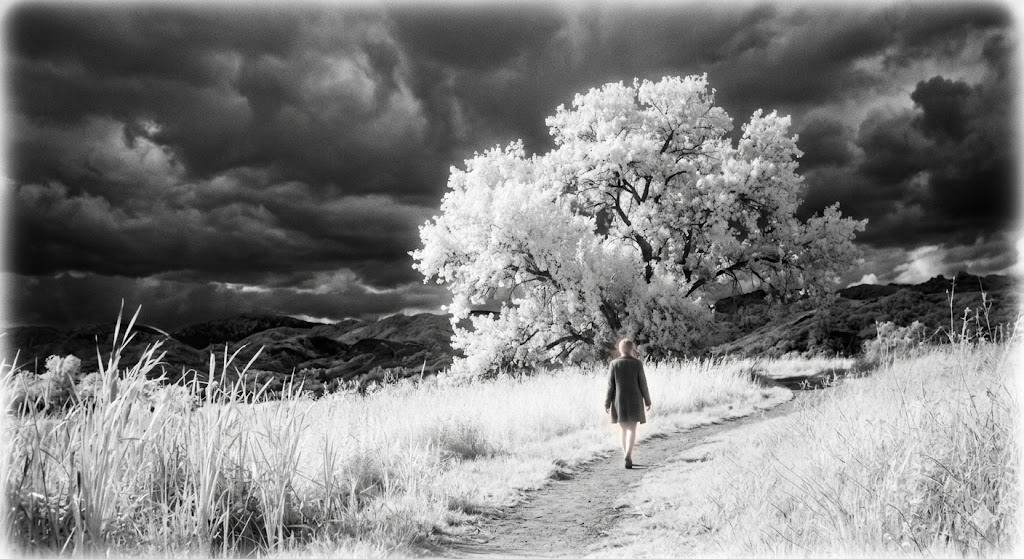
“Apply an infrared black and white effect to this photo. Make foliage and grass appear bright white or pale gray. Darken the sky to a deep, dramatic tone. Give skin tones a luminous, slightly glowing quality. Add a slight halation around bright edges. Make it feel otherworldly and surreal, like a classic infrared film photo.”
Infrared photography is one of those styles that stops people mid-scroll. It looks like our world, but wrong. The grass is white. The sky is nearly black. Skin glows. Trees look like they’re lit from within. It’s beautiful and strange at the same time.
Traditional infrared film captured light beyond the visible spectrum — light our eyes can’t see. The results were genuinely surreal. This prompt asks Gemini to simulate that effect using tone manipulation.
“Make foliage and grass appear bright white” is the defining instruction. That’s the most recognizable feature of infrared photography and it’s what makes the image feel immediately otherworldly. The contrast between white trees and a near-black sky is the whole visual signature of the style.
Best for: Landscape photography, forest scenes, portrait art, countryside photos, fine art surreal photography.
Prompt 17 — How Do You Edit a Foggy or Misty Photo Into a Haunting Black and White?
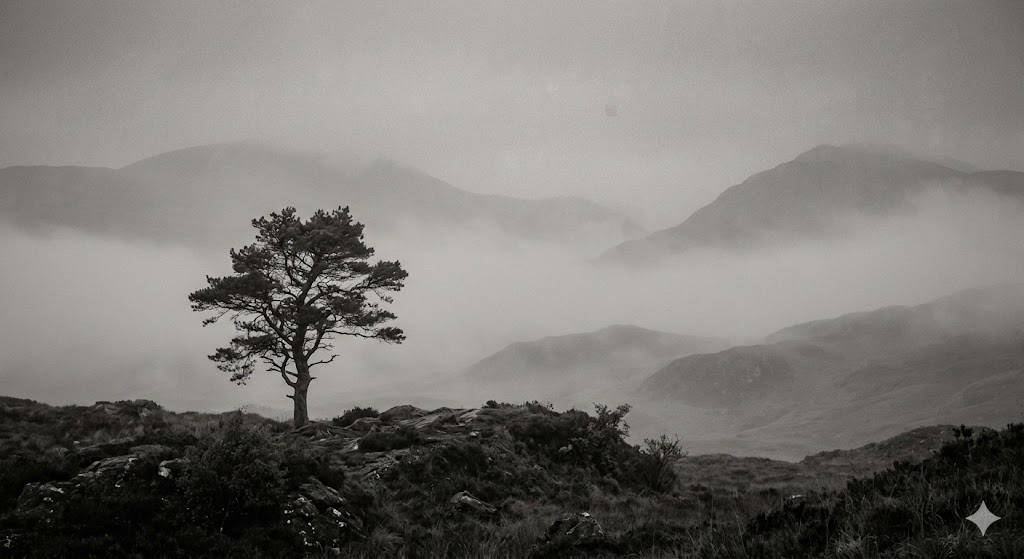
“Convert this foggy landscape photo to black and white. Keep the fog soft and ethereal — don’t remove it. Gently increase the contrast between the foreground subject and the misty background. Use a limited tonal range — mostly mid-tones and soft darks, with very few pure blacks or whites. Make it feel quiet, mysterious, and slightly haunting.”
Fog is one of nature’s best photographers’ assistants, and it’s even more beautiful in black and white. It naturally softens backgrounds, isolates subjects, and creates layers of depth. But edited wrong, fog becomes a gray blob.
The most important instruction here is “keep the fog soft and ethereal — don’t remove it.” AI tools can sometimes try to be too helpful and sharpen or clarify what they think is blur or haze. Telling Gemini to preserve the fog stops that from happening.
“Limited tonal range — mostly mid-tones” is the other key line. Fog-filled photos don’t have pure blacks and whites. Everything is softened into the middle range. Asking Gemini to stay in that range keeps the ethereal quality intact.
“Quiet, mysterious, and slightly haunting” is the emotional direction. Not dramatic. Not powerful. Quiet. That single word steers Gemini away from heavy-handed contrast edits.
Best for: Misty forests, foggy cityscapes, rainy streets, moody morning shots, nature scenes at dawn or dusk.
What Pro Tips Will Make All Your Black and White Prompts Better?
These pro tips will sharpen your results across all 17 prompts — covering image quality, ratio selection, uploading correctly, and prompt refinement.
- Always upload the highest resolution image you have. Gemini works with what you give it. A sharp, well-exposed original produces a sharp, well-edited result. A blurry, compressed image stays blurry after editing — the AI can’t create detail that wasn’t there to begin with.
- Match your ratio to your platform before you start. Don’t upload a 9:16 photo and then wonder why the result looks cropped for a website. Decide where the photo will be used first, then match the ratio accordingly. It saves you from re-editing later.
- Run the same image through three different prompts. I always test at least three versions of a prompt on the same photo. The differences teach you exactly what each word in your prompt is doing. It’s the fastest way to improve your prompt writing.
- Be specific about what NOT to do. One of the most underused strategies is telling Gemini what to avoid. “Don’t soften the edges,” “don’t crush the shadows to pure black,” “don’t add grain” — these negative instructions prevent the AI from making default decisions you don’t want.
- Reference real photographers or film styles when you have a clear vision. Names like Ansel Adams, Dorothea Lange, Henri Cartier-Bresson, or Diane Arbus carry specific visual signatures. Film references like “Kodak Tri-X 400” or “Ilford HP5” point Gemini toward very specific grain structures and tonal characters. These references are powerful shortcuts.
- Check the watermark after generating your image. Gemini sometimes adds a watermark to AI-generated or AI-edited images. If you need a clean version, read this guide on how to remove a Google Gemini watermark before publishing or printing.
- Use a square 1:1 ratio for your first test. When testing a new prompt, square format is the most forgiving. It gives Gemini a balanced canvas to work with and shows you the tonal distribution clearly before committing to a final crop.
- Save every prompt that works in a notes document. You will forget the exact wording of a great prompt faster than you think. Keep a running document of prompts that got results you loved. It becomes your personal prompt library over time.
| Platform | Best Ratio | Why |
|---|---|---|
| Instagram Feed (Portrait) | 4:5 | Takes up more screen, better engagement |
| Instagram Feed (Square) | 1:1 | Clean, balanced, classic grid look |
| Instagram Stories / Reels | 9:16 | Full smartphone screen |
| Twitter / X Post | 16:9 | Horizontal, fits preview window perfectly |
| 1:1 or 4:5 | Professional, clean appearance | |
| Website Hero Image | 16:9 | Wide banner format |
| Printed Photo (Standard) | 3:2 | Matches standard print sizes (4×6, 6×9) |
| Printed Photo (Square) | 1:1 | Standard square frame sizes |
| Wall Art Print (Large) | 4:3 | Matches common frame proportions |
| YouTube Thumbnail | 16:9 | Required by platform |
| Smartphone Wallpaper | 9:16 | Fits phone screen exactly |
What Else Can You Create With Gemini AI Beyond Black and White?
Gemini AI can create portraits, landscapes, logos, 3D models, retro designs, couple photos, family portraits, and much more — black and white editing is just one part of what the tool can do.
Once you’ve mastered black and white prompts, there’s a whole world of Gemini AI creativity to explore. If you’re working on portrait photography, the best Gemini AI prompts for girls offers a full set of creative directions you can test. For branded or business use, the best Gemini AI logo prompts can help you generate clean, professional identity assets. And if you want to push into completely different territory, the Gemini AI 3D model prompts open up a completely different type of visual work.
The core skill is always the same though: writing a specific, intentional prompt that gives Gemini a clear direction. Black and white photography just happens to be one of the most rewarding places to start because the results are so immediately visible and dramatic.
For a broader foundation, the AIPrixa resource library covers all of this and more — it’s a great bookmark to keep handy as you grow your Gemini skills.
Frequently Asked Questions
Can You Use Gemini AI to Edit Real Photos You’ve Already Taken?
Yes. You can upload your own photos directly into Gemini and use these prompts to edit them. Just attach your image to the chat before typing your prompt. Gemini will apply the editing instructions to your actual photo — not generate a new one from scratch. This is the most useful way to use these prompts.
Do You Need a Paid Gemini Plan to Edit Photos in Black and White?
No. Basic photo editing with Gemini prompts is available on the free version. However, the paid Gemini Advanced plan gives you higher quality outputs, more detailed edits, and better performance on complex prompts. For casual use, the free version works well.
Does the Image Ratio You Upload Affect the Final Result?
Yes. The ratio of your uploaded image directly affects how Gemini processes and outputs the edit. A 9:16 vertical image will be treated differently from a 16:9 horizontal one. Using a ratio that matches your intended platform — social media, print, or website — gives you a cleaner, more usable final result.
Can You Combine Two Prompts Together for a More Complex Edit?
Yes. You can combine multiple instructions in a single prompt. For example, you could combine the vintage film look (Prompt 6) with the dramatic portrait contrast (Prompt 1) by writing both sets of instructions together. Gemini handles multi-instruction prompts well as long as the instructions don’t directly contradict each other.
Is It Possible to Get Consistent Results Across Multiple Photos With the Same Prompt?
Yes. Using the exact same prompt on similar photos produces consistent results. This is useful if you’re editing a set of photos — like a full portrait session or a wedding gallery — and want a uniform black and white style across all of them. Save your best prompts and reuse them exactly.
Do You Need Photography Experience to Use These Prompts?
No. These prompts are designed to be used by anyone. You don’t need to understand tonal ranges, grain structures, or film stocks to get great results. Just follow the prompts as written. The technical language in them is there to guide Gemini — you don’t need to understand every word, just copy and use them.
Will These Prompts Work for Smartphone Photos?
Yes. These prompts work on any photo — DSLR, mirrorless, or smartphone. Smartphone photos are typically in 9:16 or 1:1 ratios. Just upload your phone photo to Gemini, match the prompt to the subject type (portrait, landscape, street, etc.), and the editing instructions apply the same way they would to a professional camera photo.
Ready to Start Editing Your Photos in Black and White?
Black and white photography has been around for over 150 years for a reason. It never stops being powerful. And now, with Gemini AI, you don’t need a darkroom, expensive software, or years of editing experience to get professional-quality monochrome results.
You just need the right words.
Start with one prompt from this list. Pick the subject that matches a photo you already have. Upload it to Gemini, type the prompt, and see what comes back. Then tweak. Try another version. Compare the two. That process — upload, prompt, compare, refine — is how you get really good at this, really fast.
The 17 prompts in this guide cover almost every type of photo you’ll ever want to edit. Portraits. Landscapes. Street scenes. Weddings. Sports. Architecture. Fine art. Vintage film. All of it is here.
If you want to keep building your Gemini skills, start with learning how to write better Gemini photo editing prompts and explore the full library of trending Gemini AI prompts people are using right now. Both resources will take everything you learned here to the next level.
Your photos are waiting. Go make them beautiful.
You May Also Like
 AI Models
GPT-5.5 vs Claude Opus 4.7 vs Gemini 3.1 Pro: Real Benchmark Results Compared
 AI Prompts
20 Funny Things to Ask ChatGPT When You Need a Study Break
 AI Tutorials
How to Use AI in 2026: My Honest Guide After Testing Every Major Tool
 AI Models
The Best AI Models: Types and Examples You Should Know
 AI Tool Reviews
DeepSeek vs. Claude, Grok, Qwen, and Gemini: Which AI Model Actually Fits Your Needs in 2026
 AI Tool Reviews